

Overview
Lyra implements the OAuth 2.0 Authorization Code flow. This lets third-party applications request permission from Lyra users and receive scoped access tokens to call the API on their behalf. Use OAuth when you’re building an integration that other Lyra users will authorize — for example, a scheduling tool that creates Lyra meetings for its customers.If you only need to access your own workspace programmatically, an API key is simpler and provides full access without scopes.
Create an OAuth Application
1
Open OAuth Settings
Navigate to Settings → Developers → OAuth Clients in your Lyra dashboard.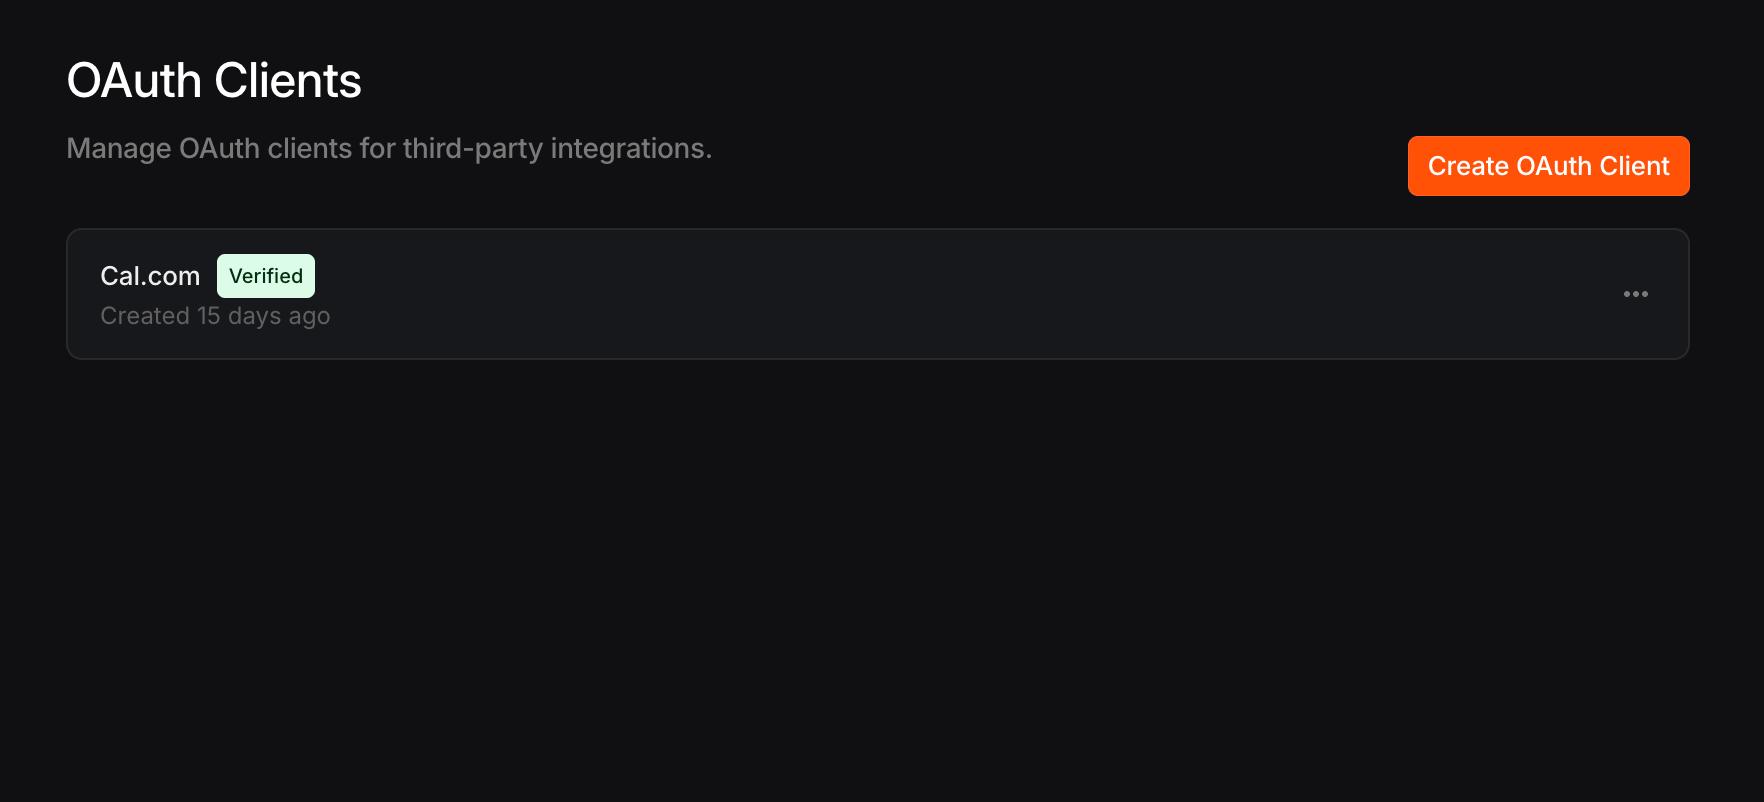
2
Register Your Application
Click Create OAuth Client and fill in the required fields: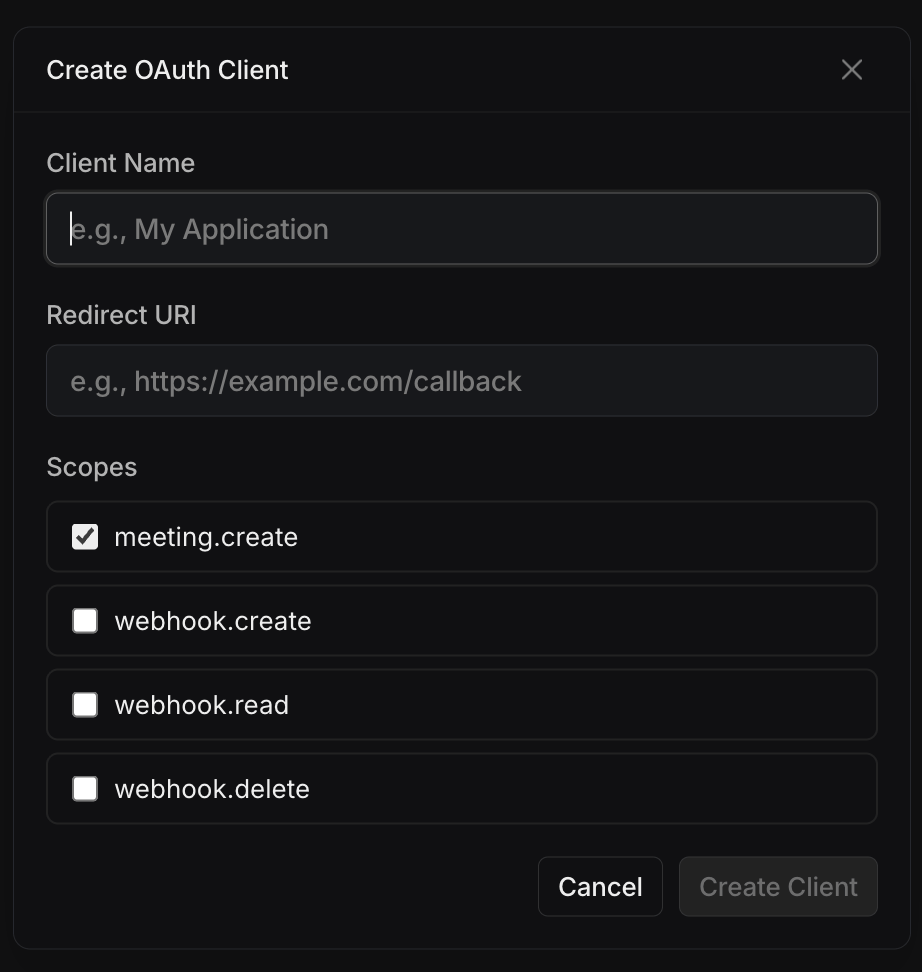
3
Save Your Credentials
After creating the application, you’ll receive a Client ID and Client Secret.
Available Scopes
Scopes control what your application can do on behalf of the user. Request only the scopes you need.Authorization Flow
The OAuth flow has three steps: redirect the user, receive the authorization code, then exchange it for tokens.1. Redirect the User to Lyra
Send the user to the Lyra authorization page with your application’s parameters:
The user will see a consent screen showing your application name and the requested permissions.
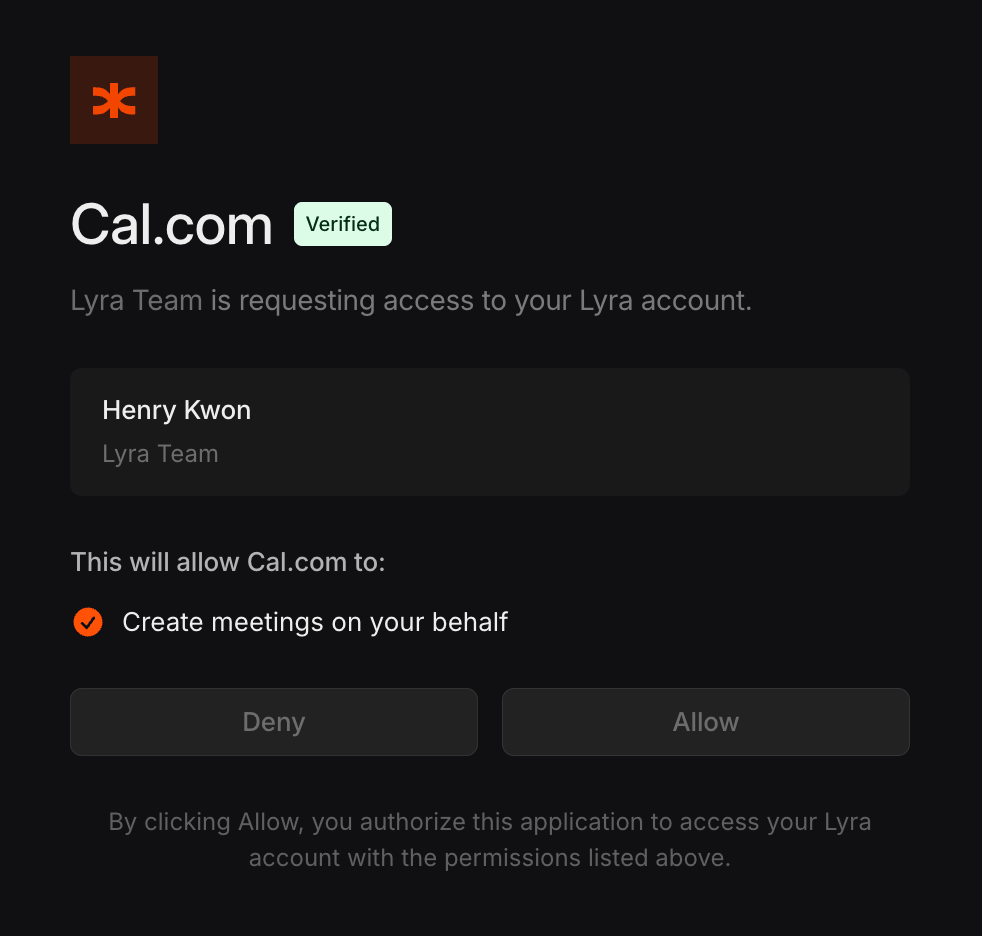
2. Receive the Authorization Code
After the user approves, Lyra redirects to yourredirect_uri with an authorization code:
Authorization codes expire after 10 minutes and can only be used once.
3. Exchange the Code for Tokens
Make a server-sidePOST request to the token endpoint to exchange the authorization code for an access token and refresh token.
Using OAuth Tokens
Pass the access token as a Bearer token in theAuthorization header, just like an API key:
403 response: